


Kawaii Frog Free Add-On: The Dribblit

Enjoy this adorable and FREE add-on for those who have already purchasbleted my Kawaii Frog Sewing Pattern. This free pattern add-on brings a little Fantasy to the large eyed frogs show casing even more charm!
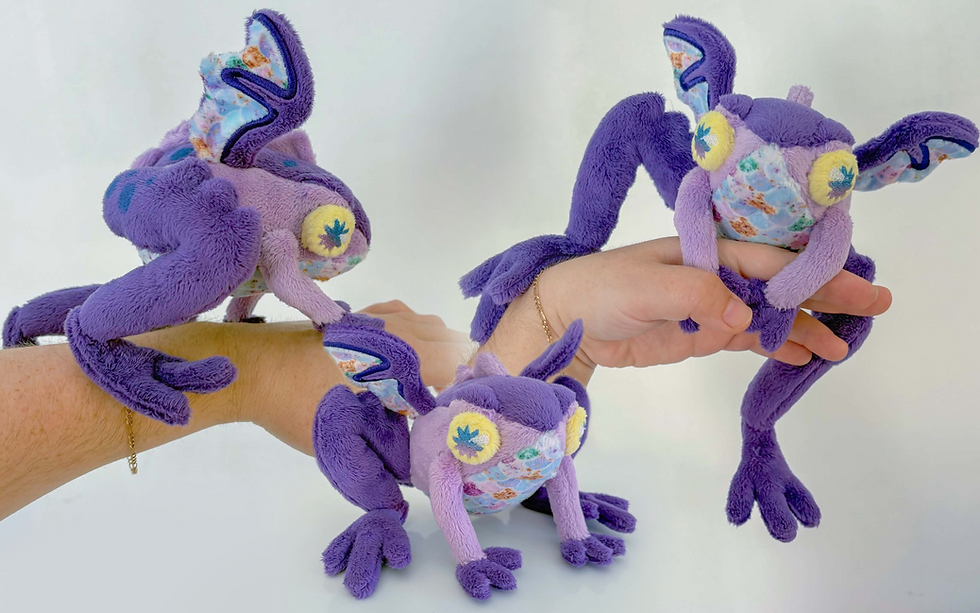
The thought of a dragon frog - who wouldn't want one after all? They are something of a unique creature that I felt needed a specific name. That is where I came up with the name of a Dribblit. This free add-on will add wings, spiked back legs, back fin/spikes and various new pupil shapes to choose from if embroidering via machine!
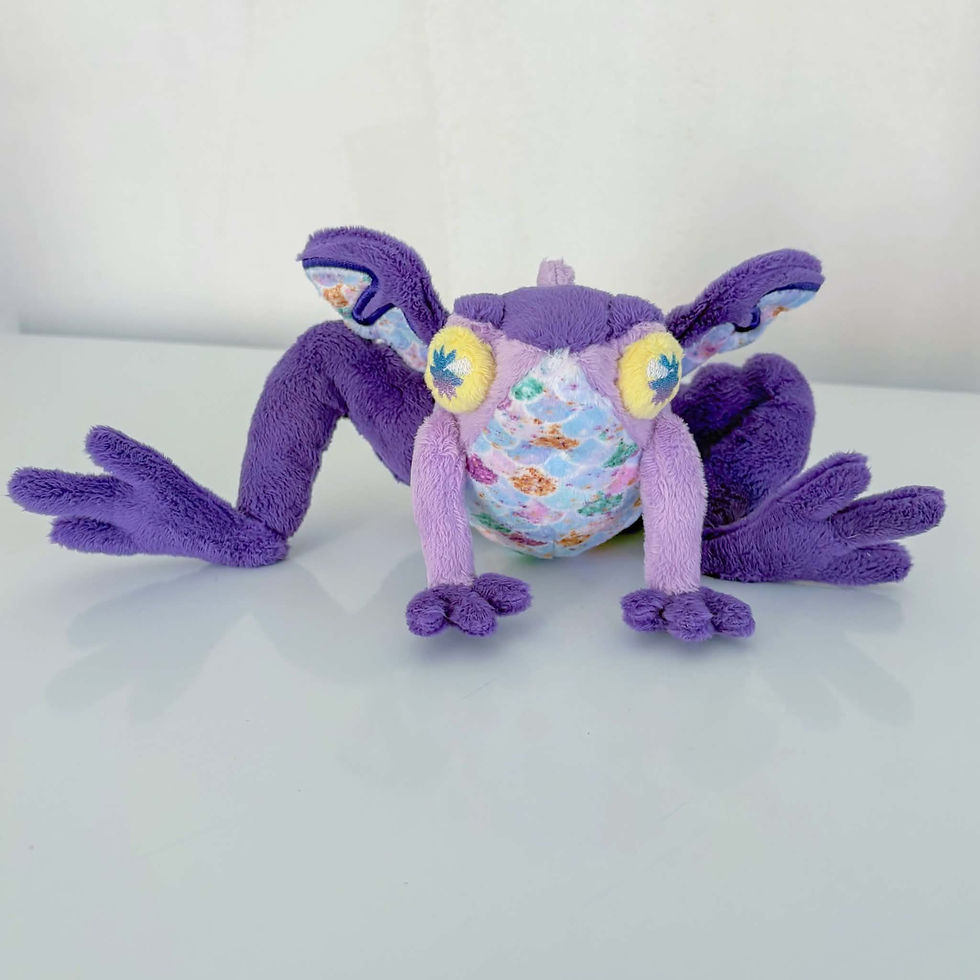
With my Kawaii Frog Pattern already purchased you can follow the tutorial provided with it to create the Dribblit as shown in the example images above. If you haven't purchased my Frog Pattern then you likely will not be able to use these free add-ons to achieve the finished result via this blog. If you are looking on where to purchase my bag pattern please visit the link below:
Now let's get started with this Free Add-On! You will need to print off the Free Add-On Pattern pieces first and/or download the New embroidery for your embroidery machine. This project will fit both 4x4 and 5x7 embroidery hoop sizes. As always 4x4 hoop users will have more hoops needed to complete the final result compared to 5x7 users.
I am also saddened to say that by adding the spikes to the back legs it makes the back legs too large to fit within the 4x4 hoop size. As such 4x4 users will need to sew the back legs traditionally via the sewing pattern piece provided.
Visit the link below to collect and download the Free-Add-on pattern pieces.
FINALLY we can jump into the Add-on! We can start by prepping the embroidery if you have an embroidery machine. One bonus is ALL the eye shapes I have added that fit in a 4x4 hoop alone. If you have a machine that can edit on the screen - you can duplicate the design and move them around to make more than 1 set of eyes at a time if you'd like! Open whatever eye file suits your particular Dribblit design. Use the image below as reference for the new eye shapes.


All of the eyes will stitch in this exact order. For my Dribblit I am using the 'Splash Eyes'.
Your machine will stitch 2 circles onto the staiblizer where the eyes will be. Lay down a color of minky in your choice for the eyes that covers the 2 circles stitched to the staiblizer. The next step will tack the minky to the stabilizer securing it in place.
Cover the small area with a scrap piece of water soluble stabilzier and allow the machine to stitch out the pupil. I did my pupil in a light purple/mauve to match my Dribblit color scheme. However - use your imagination and make the colors pop if you want! OR do alternating eye colors by stopping the machine between pupils!
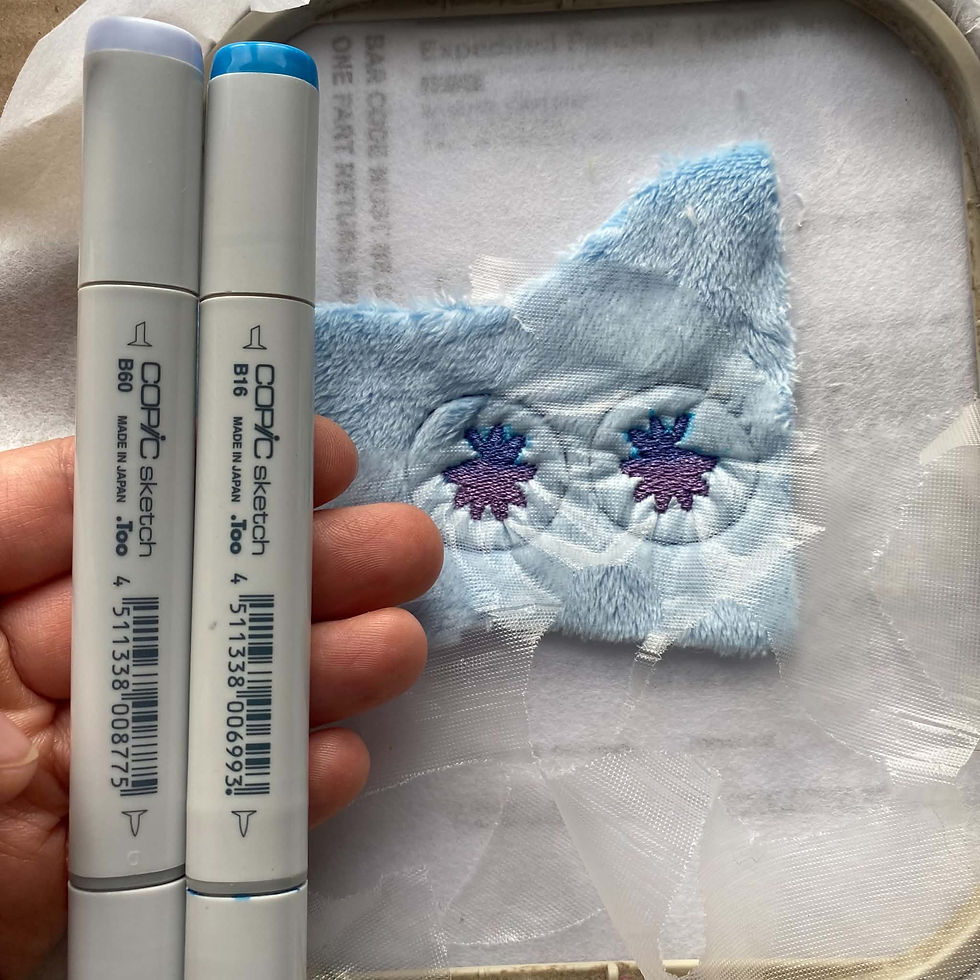
2. With the water soluble stabilizer over the minky - this allows us a bit more creativity IF you want. This is completely optional.
If you have some alcohol markers around (I like Copics best) you can grab a darker color than your thread + a blender color.
Quickly do a few layers of the darker color followed by the blender on the edges where it meets the original thread color. This is a great way to add simple gradients to embroidery in a controlled way. Keep in mind you must NOT do too make layers or the copic markers will bleed onto the minky from the embroidered threads.

3. The final embroidery step is to do the white eye shine. You can do this right over the stabilizer even if copic marker is on the stabilizer - it will not matter.
Once the eye design is finished pull the stabilizer away and assess your cute Dribblit eyes <3 !!
Meanwhile that gradient effect is looking all too good ;)

4. Cover the eyes with a matching piece of minky and stitch the eyes closed.
You can now remove them from the hoop and carefully cut out each. Make a small cut to the back of each eye and turn it right side out there that small snip.
As always I 100% will recommend hemostats for turning pieces. They are a life saver!!
At this point in the tutorial we can start prepping the wings and back spike. These are in it's own hoop of 5x7 or broken into multiple 4x4 hoops. For my example I am opting to use the larger 5x7 hoop for ease. Remember if you are a 4x4 user - you will need to 'FLIP' the wing design to get the opposite wing stitched out properly. ALL embroidery machines can flip designs so should be an easy button to locate on your machine.
** Note: If you are sewing the legs and back spike traditionally from the given pattern pieces newly added - please understand these new pieces do NOT have seam allowance added. They are mean't to be "quick sew" pieces where you trace the sewing line directly onto the fabric and stitch directly onto that sewing line to finish the piece ontop of two piece of minky together right sides touching! The wing does have seam allowance included with the option to use the guide for the wing membrane as applique pieces as well **

5. When you open the Wings/Back Spike file - the first thing I have added not shown here is stitch out guide lines that will stitch directly onto the hoop. These guide lines are outlines of WHERE the wings and back spikes will be giving us an idea of how much fabric we need to use and where to place the fabric.
The second step is sandwiching 2 pieces of minky right sides touching and placing them over the back spikes. The machine will stitch the back spikes closed all in one step with the bottom open completely. I chose a lavender/mauve for my back spikes here.

6. The wing assembly is next. Place some minky fabric down covering the wing outlines in the upper portion of the hoop. The machine will tack this fabric to the hoop.
I opted to use my own printed minky for a scale design here. Because it was a directional print I did stop the machine between each wing and lay the fabric the right way. This is also an option for those looking to use directional prints.
Note: This first wing step is creating the INSIDE of the wing details
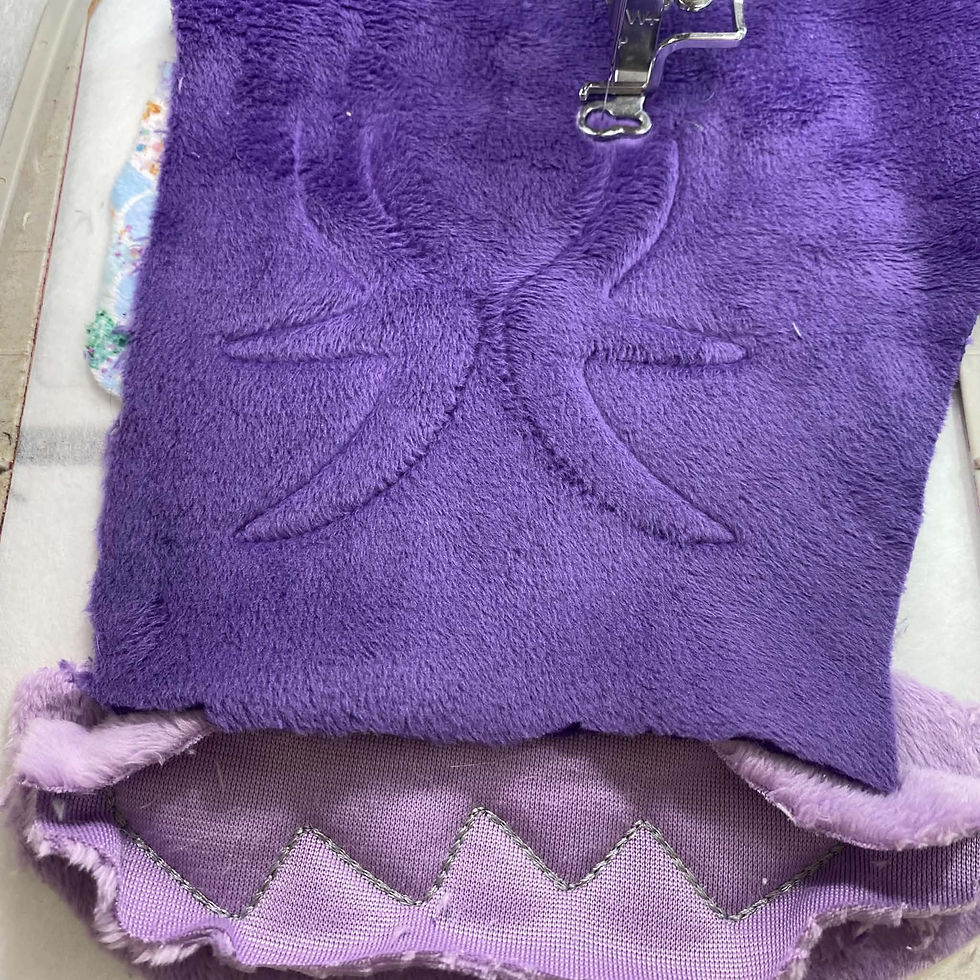
7. Grab a different color of minky fabric and lay this over the wings once again.
The machine will tack this fabric down in the shape of the wing membranes
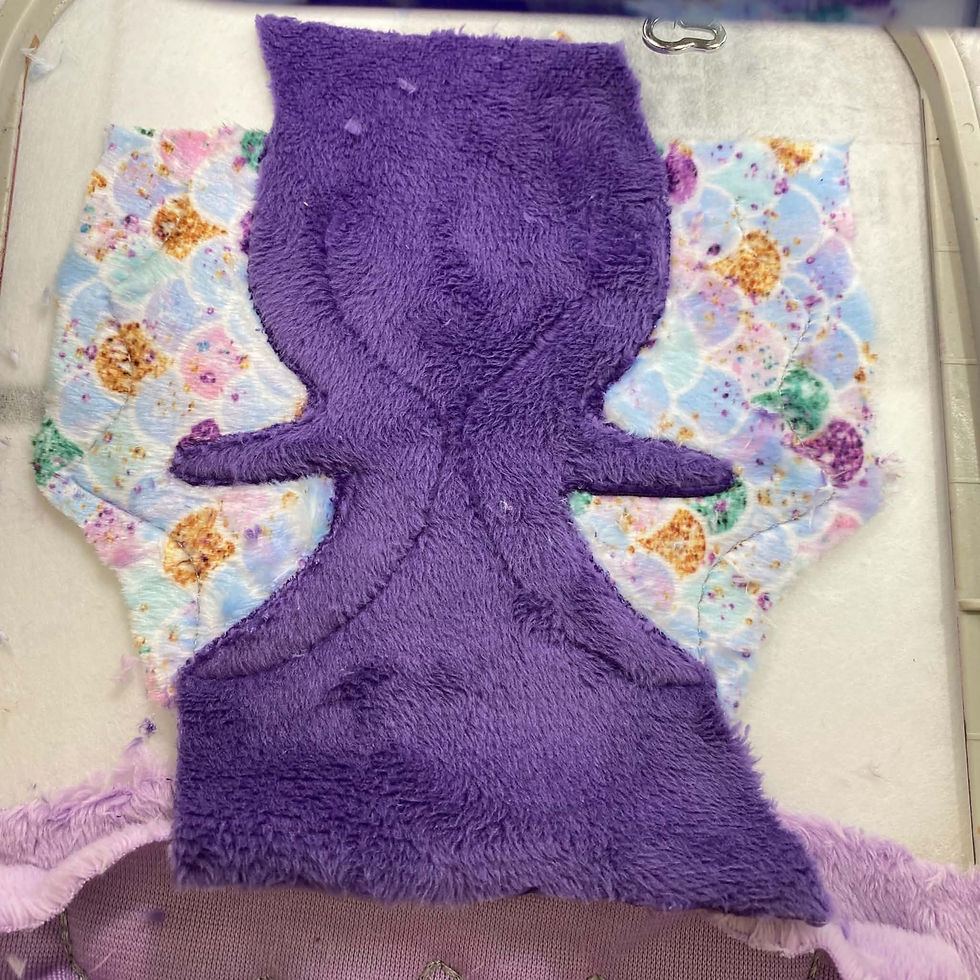
8. Use small sharp scissors and trim away excess fabric along the inside only of the wing membranes - this will reveal the alternate color minky below that we originally started with!
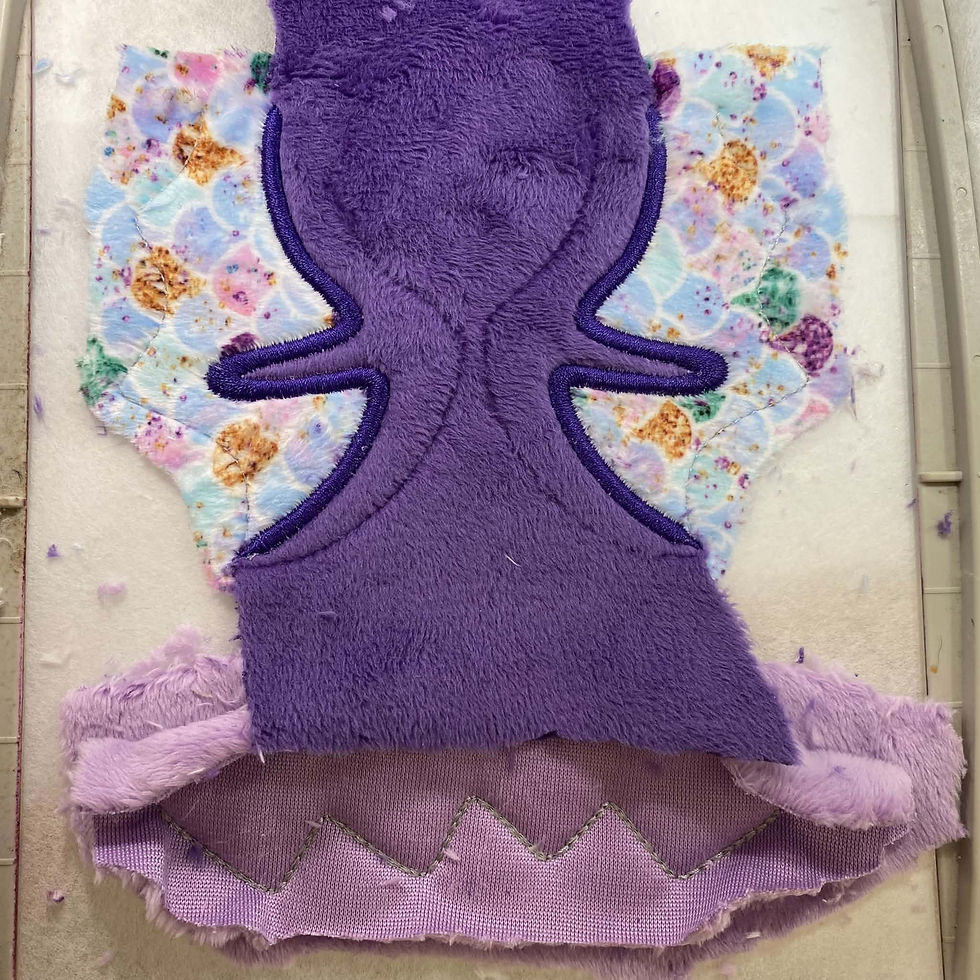
9. Cover the wing membrane area only with some waters soluble stabilizer and allow your machine to stitch out the wing membrane details via satin stitching. This secures the unfinished edge nicely
Once finished pull away the water soluble stabilizer from the project
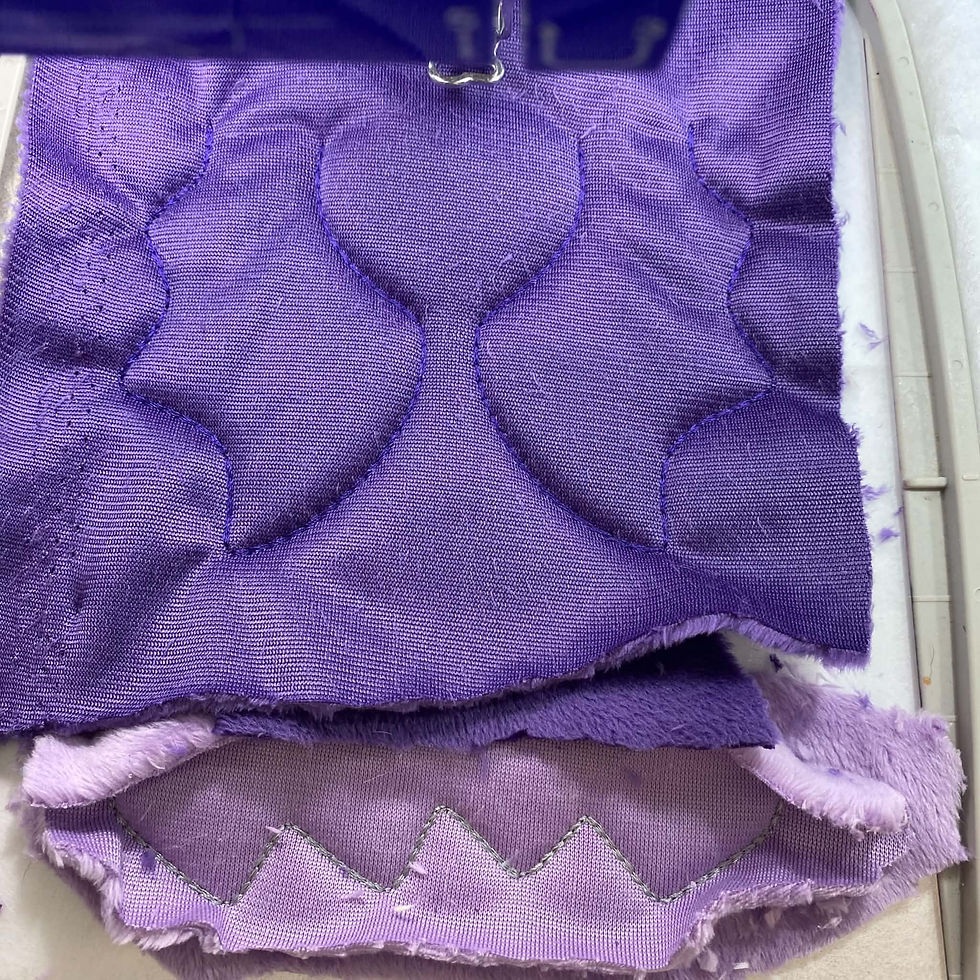
10. Take 1 final piece of minky and lay right sides touching down over the wing design.
Your machine will now stitch the wings closed except the end openings.
Remove all piece from the hoop.
You can carefully cut out the wings and set aside for a moment.
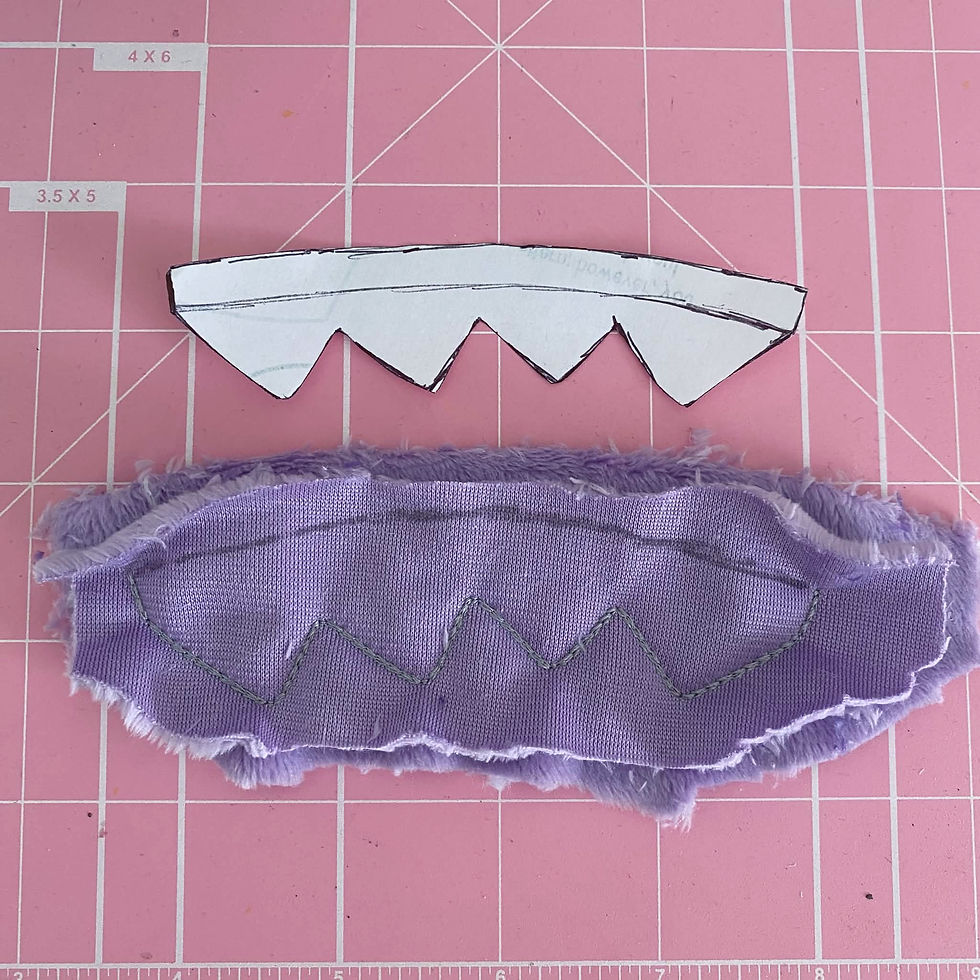
11. For the back spikes I like to use the original pattern piece provided for sewing on the new add-on pages that is downloadable above via this blog.
You can use the bottom edge to draw the curve properly. This will line up with the pattern later on.
Now you may cut out the back spikes and turn right side out

12. Both the wings and back spikes should be finished as shown to the left.
For the back spikes - I do recommend taking a sewing machine and stitching along the outside edge 1/8". This will prevent the spikes from sinking inwards on themselves later once inserted into the seam along the back of the Dribblit.
I didn't do this step and found that my spikes do turn inwards on themselves at times. This could have been prevented had I sewn around the spikes carefully on my sewing machine to secure them outwards. I'll leave this as optional to you and let you decide.

13. The final new hooping to this design is the spiked back legs.
This adds even more of a dragon-like charm to the Dribblits.
Open the file, hoop some new stabilizer and allow your machine to stitch out where the legs will be directly onto the stabilizer.
Cover the hoop properly with 2 pieces of minky fabric right sides touching. Your machine will now stitch out and finish the legs during this second step. Easy and quick - I like projects that way! Remove from the hoop - cut out and set aside for later
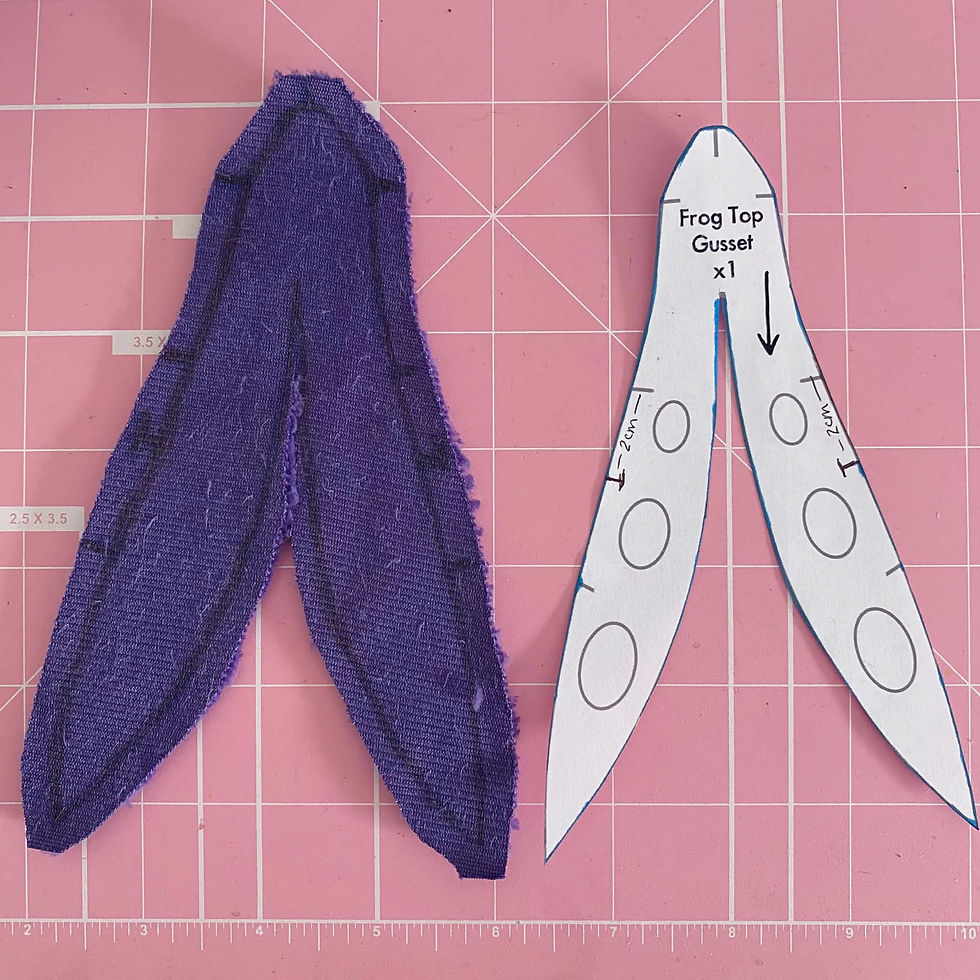
14. Grab the top Frog Gusset pattern piece from the original Kawaii Frog Sewing Pattern.
From the mid pattern mark I marked 2cm down on each side. My wings ended up too far back. I would recommend only 1.5cm down from the mid mark for more centred wings on the frog's back.
Transfer those new marks onto the fabric piece so we know exactly where to baste the wings! We also will cut quite close into the centre 'dart'. This will allow us plenty of room to add the back spike.

15. Prior to basting the wings I prefer to finish the top Frog Gusset by adding the eyelids as per original pattern
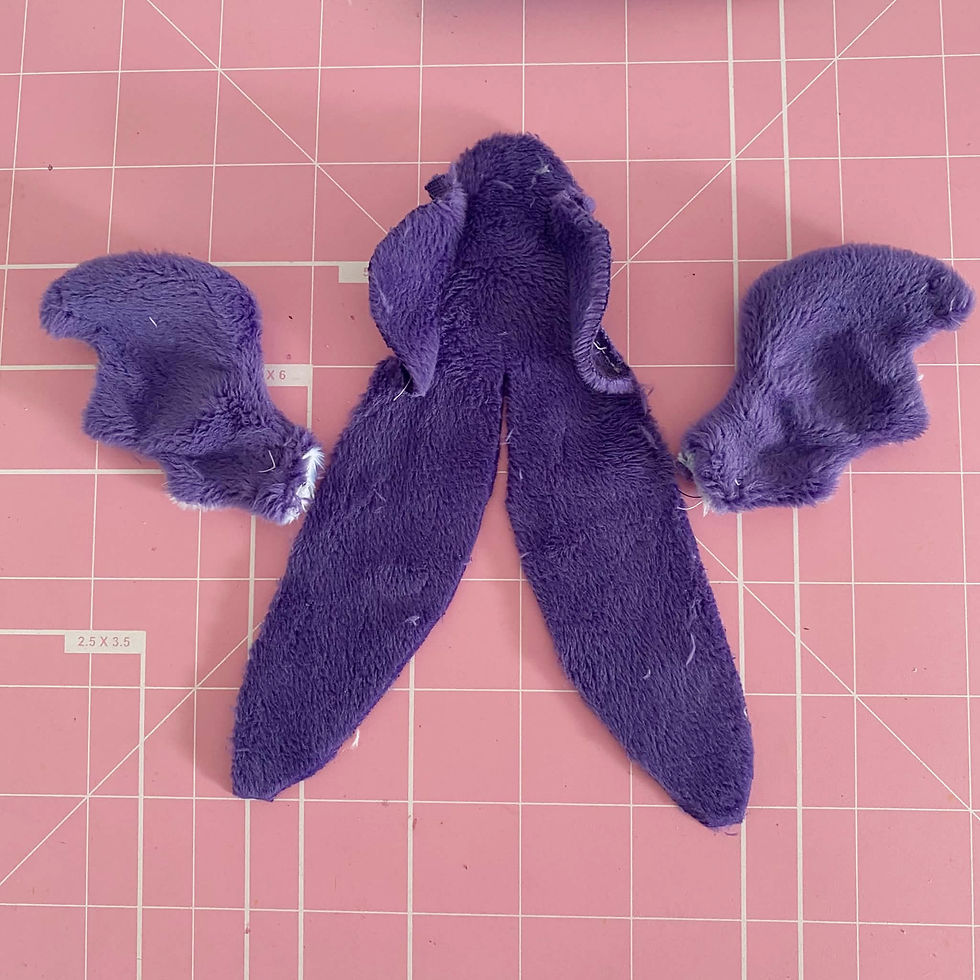
16. Now we can baste the newly made wings in place.
Start with them face down in the same direction as mine.

17. Pin/clip 1 wing in place at a time and baste 1 wing at a time with a longer stitch length of 3.5-4mm in length.
Use a longer stitch length in case you need to re-do a wing.
Line the front bottom of the wing up with the start of the new mark you made on the pattern piece on each side.
You will stitch the wings exactly as shown once flipped inwards on the gusset. This will ensure they are facing the correct way.
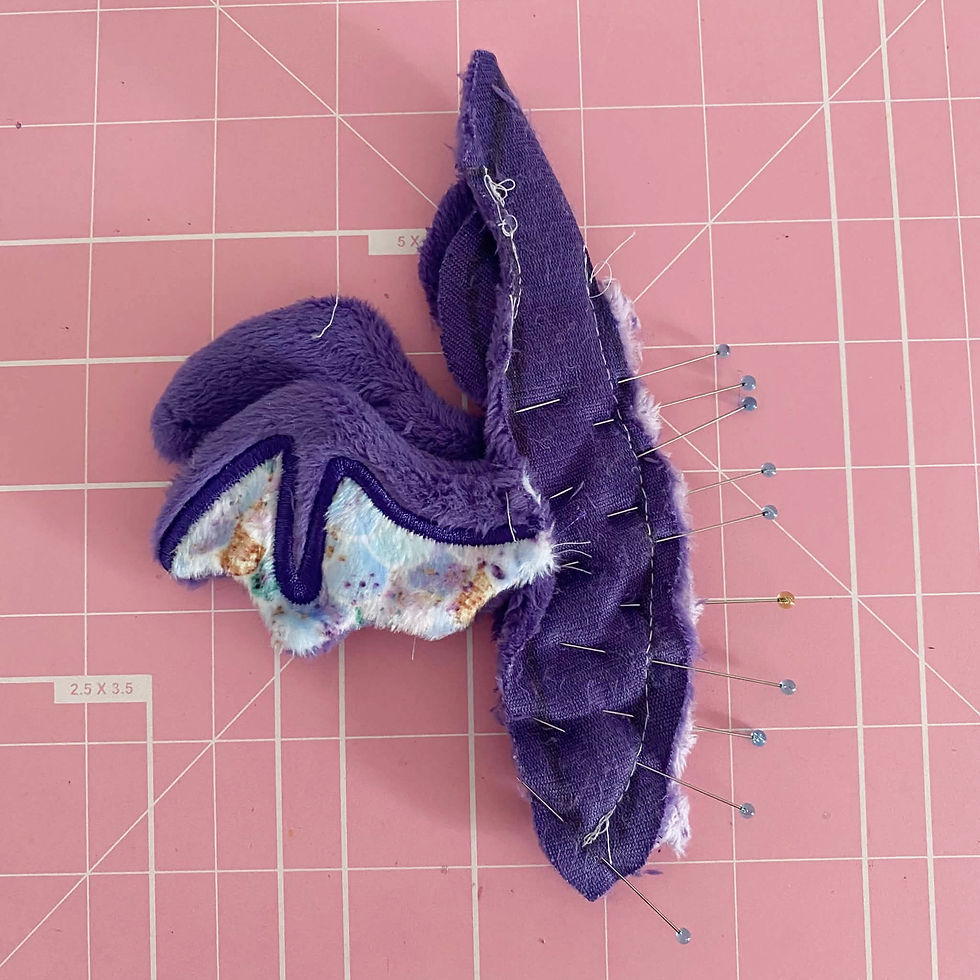
18. Take the back spike and tuck it INSIDE the frog gusset dart in the middle.
Pin in place (I use many pins to prevent it from shifting).
Again, I recommend sewing with a basting stitch of 3.5-4mm in length first. If the comes out properly then feel free to go over the same stitch line with the normal 2.5mm stitch length.
Note: I sew personally directly onto the sewing line. If you are using seam allowance here I recommend starting with the basic 1/4" seam allowance included in the pattern. But as you ease closer to the top forehead of the pattern - drive the presser foot closer to 1/8" seam allowance. This is because we remove the fabric along the centre gusset dart in order to attach the back spike - thus it removes some of that original seam allowance as you near the tip of the dart!
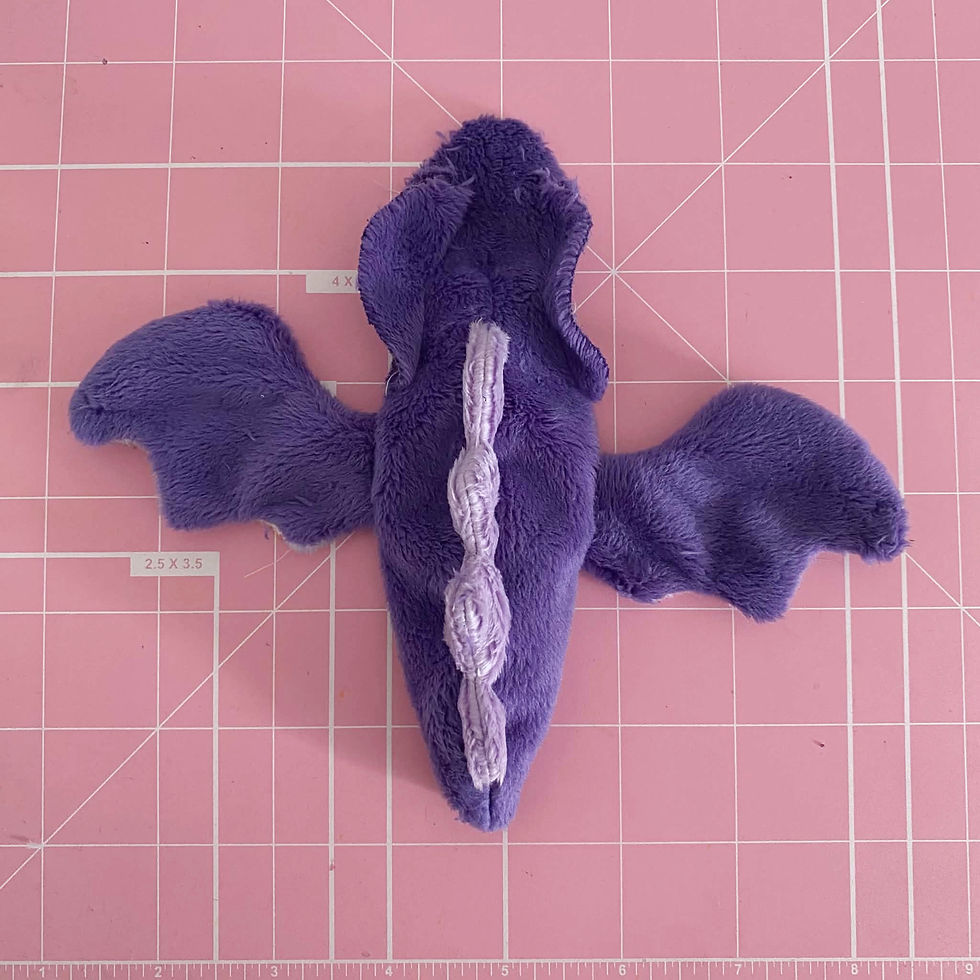
19. Here is the true teller of how this are going - flip your piece right side out and set it down onto your table.
This is why we BASTE the wings. As you can see to the left - my wings were originally uneven!
I had to remove 1 side and redo it a few times to get them both even on each side. This is crucial or else your wings on the finished plush will be very uneven. Take your time and get this step correct the first time :) You will thank me later!

20. Finish assembling the Frog body as per the original Kawaii Frog sewing tutorial.
You should now have an unstuffed body with wings as shown the left

21. And here is my version finished and stuffed with the body and eyes. No legs yet!
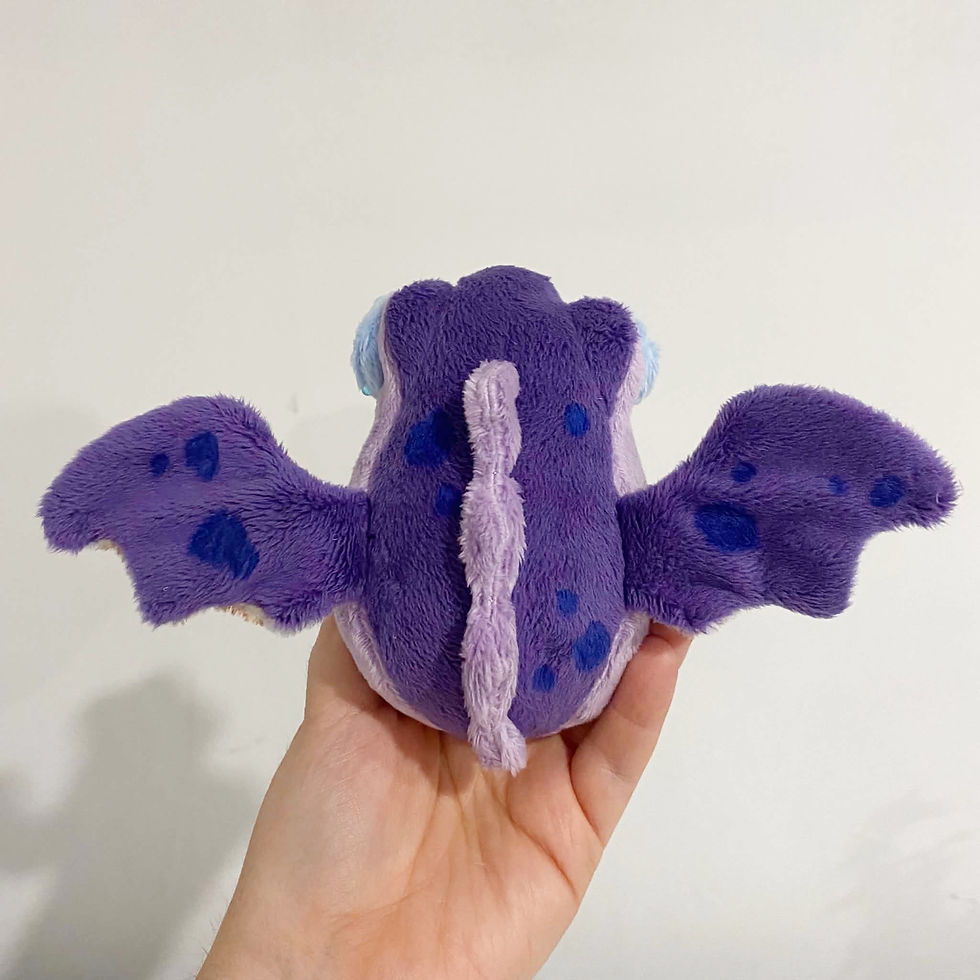
22. One detail I like to mention: if you have darker alcohol markers on hand you actually can paint the minky by using the brush end and brushing down with the minky fur.
I used a dark royal blue copic marker to add dragon spots to my Dribblit by hand! This is a technique that works best with only doing 2 coats of the copic marker and allowing to dry before ever brushing it. Don't paint/color against the fur fibers - only down with them for nice crisp looking spots. On the opposite spectrum if you want to use lighter colors like this, you can opt for fabric paints but they will change the texture of the minky. An airbrush also would shine here! You could easily add some gradients to the plush body and airbrushing does not change minky texture as much as paints. Remember - your imagination can create something so unique so easily!
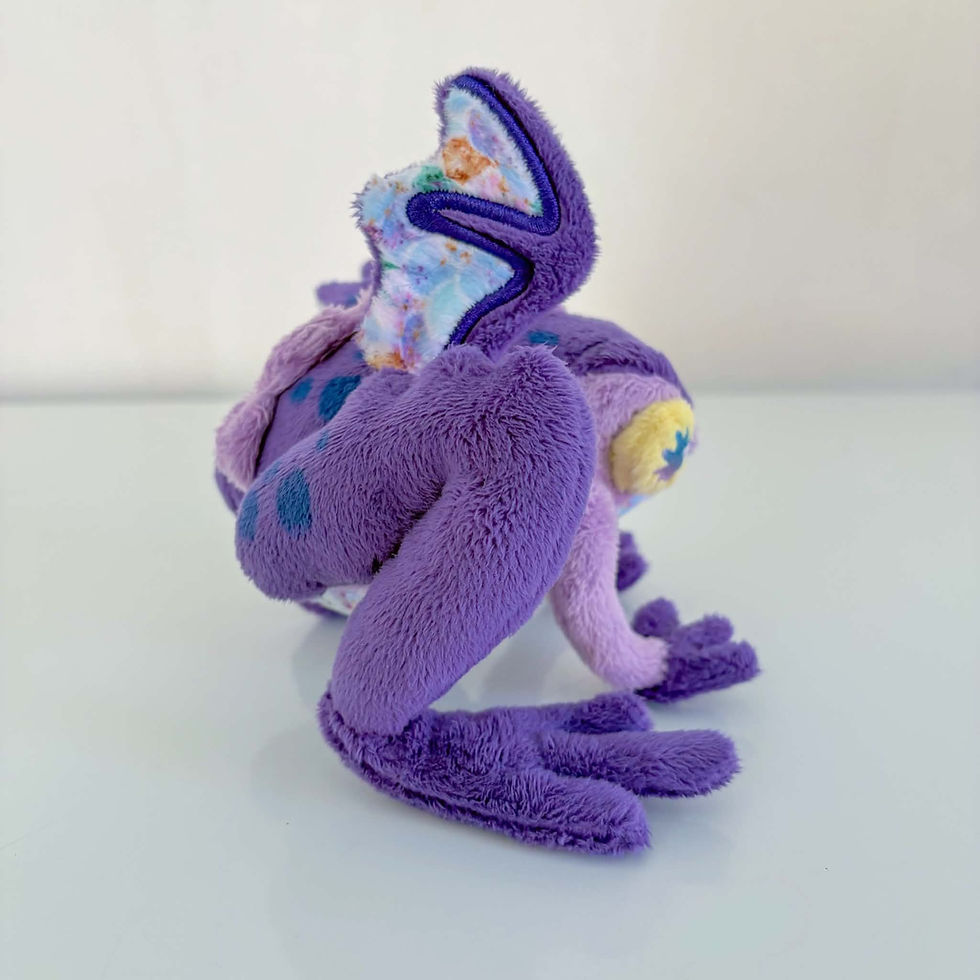
23. The final step is to finish assembling the Dribblit as per the original Kawaii Frog sewing pattern by adding the wire armature to the legs and hand sewing the legs to the body.
This gives your Dribblit full pose-ability for lots of cute photo opportunities!

Once finished you now will have such a unique and adorable Dribblit ready for love, cuddles and poses due to his bendy legs. They are the perfect size as travel companions and enjoy lots of photo opportunities! Feel free to continue to modify this pattern and get creative. If you want your Dribblit to have horns - add them. If you want a small tail? Add it. The possibilities are endless when it comes to sewing and your imagination!
I truly hope you enjoy this free add-on :) As always enjoy and happy sewing!
Want to check out a few more traditional sewing patterns? I am slowly working on bringing more and more sewing patterns to my shop and not just embroidery patterns! Check out the few I've published below.


Comments